
Streamlining Debugging in Multi-Team Apps with Automation
Every developer would rather spend time building new features than tracking down and fixing bugs, but it’s necessary to create the best user experience. While bugs are unavoidable, you can avoid a lot of the frustration and notification fatigue across different teams and team members with a well-defined debugging process.
Let’s look at how to add debugging into your product development along with automation tools to streamline the process.
Bugs are an unavoidable part of software development, but you can avoid frustration and notification fatigue when fixing them.
Creating a Debugging Workflow
Start by defining an owner who’s responsible for the health and stability of a project. For example, an engineering lead might be responsible for establishing a reliable bug remediation process and fostering a sense of code ownership across teams. They will then create daily or weekly schedules for engineers to take turns triaging bugs.
Most bugs are triaged in two ways:
- DevOps engineers responsible for deploying code to production should triage any errors they encounter during the process.
- Engineers on rotation should triage errors that aren’t associated with the release, along with any recurring or snoozed errors.
The team should then define a specific workflow to fix bugs.While some bugs may need immediate attention (reactive triage), you may also have known bugs that are periodically fixed (periodic triage). There should be processes in place to identify these bugs, determine their severity, and followup with them on an appropriate schedule.
While these workflows may be simple for small teams, multi-team apps may require more planning effort. Otherwise, you might end up sending irrelevant notifications to engineers and disrupting their focus. And, as most people can appreciate, sending a constant string of notifications often results in people ignoring them.
How to Triage with BugSnag
Most bug triaging workflows start with an impact assessment. For example, a developer might look at error frequency, the number of affected users, or the distribution across device types to determine the impact or severity of a bug. While some bugs need immediate attention, others can wait until later or may not need any remediation at all.
BugSnag automatically includes these metrics and even provides a stability score for releases. Using the “for review” filter, you can quickly see errors that need triaging to determine impact and appropriate next steps. You can also use other filters to identify severe bugs, such as those occurring in a production environment within the last seven days.
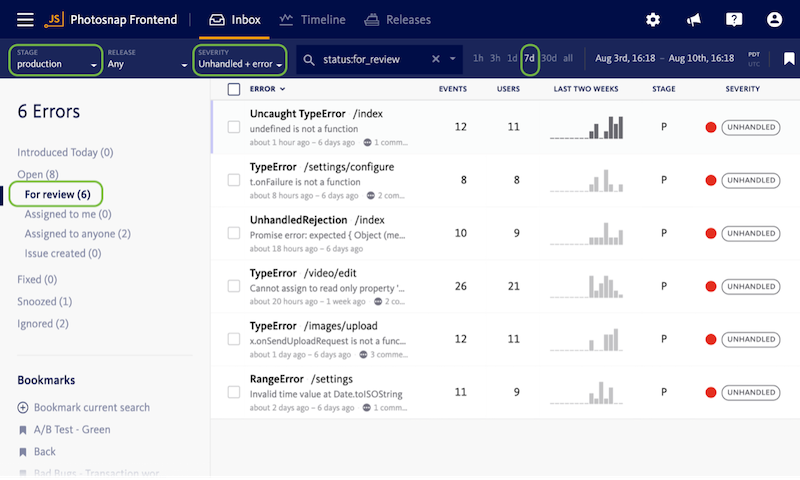
Source: BugSnag
BugSnag’s bookmarks provide additional filters for multi-team apps. Each team can define its own shared bookmark and developers can set their team’s bookmarks as the default view for their inbox. You can also create custom bookmarks for VIP customers or other priorities, making it easy to quickly identify high-priority bugs for follow-up.
Finally, you can snooze low-impact bugs for future follow-up. Rather than setting a time-based reminder, BugSnag’s snooze feature lets you configure alerts based on the number of bug occurrences over a specified time period. For instance, you may want to snooze a bug until it occurs more than 100 times per day and then follow up on it.
Streamline Your Workflows
BugSnag’s “for review” filter, bookmarks, and snooze are helpful features, but they require manual effort. Fortunately, BugSnag’s Alerting and Workflow Engine can help automate workflows and route notifications to the appropriate teams without lifting a finger. It’s one of the most powerful ways to streamline debugging and free up time.
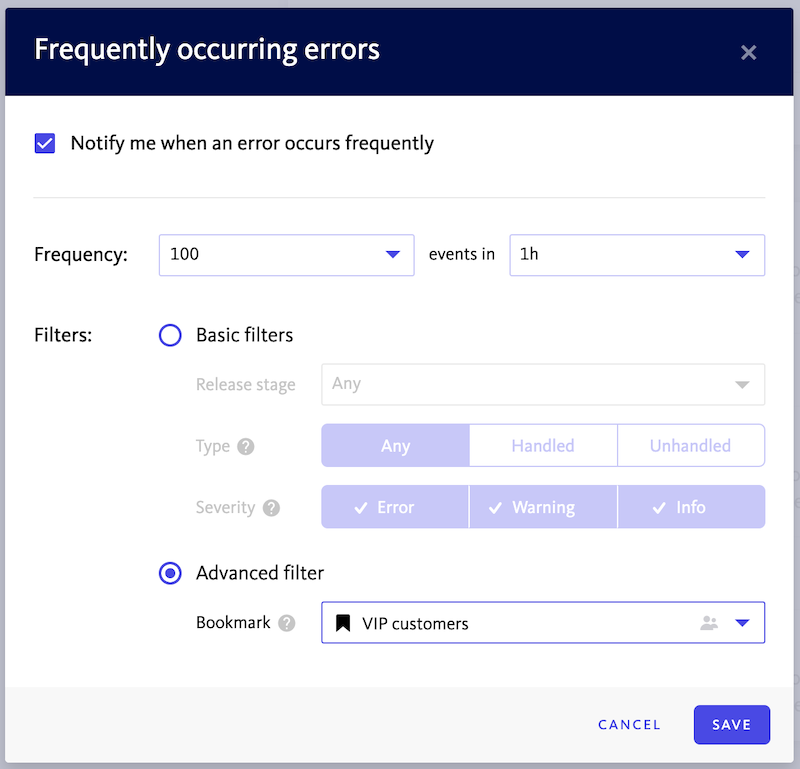
The first step is configuring smart notifications. For instance, you may only want to receive notifications for bookmarks affecting your team. Moreover, you may only want to receive notifications when more than 100 events happen within one hour. By fine-tuning notifications, you can avoid notification fatigue and enable developers to retain better focus.
After saving a set of filters or a segment with a bookmark, Bugsnag makes it easy to automatically create issues in Jira or other issue trackers. Every time a new error matches the segment’s criteria, an issue is automatically created and a two-way sync keeps the errors in sync with the linked issues in Jira or one of 30+ other supported issue trackers.
You can also route notifications to a growing list of other communication tools, including Slack and PagerDuty. That way, developers can receive notifications using the formats they want rather than forcing everything into an email inbox or bug tracker solution. The result is higher productivity and improved developer happiness.
The Bottom Line
Most developers would rather spend time building new features than debugging applications, but solving these bugs is essential to a great user experience. While debugging is a straightforward process for small teams, multi-team apps require a more robust solution to keep everyone on the same page and avoid notification fatigue.
BugSnag makes it easy to identify bugs and intelligently route them to the appropriate teams for follow-up. By only showing relevant notifications, developers can remain focused on their day-to-day efforts without constant distractions. When they do receive a notification, they appreciate the importance of a follow-up.
Get started with BugSnag for free!